
If you are anything like me, you have probably been avoiding DIY projects nearly your whole life... until now! What's different now? Pinterest of course!
I knew I wanted one of these hall trees, but I had a budget and couldn't buy one new and none of the used ones had the look I wanted. So the obvious solution was to re-do a used one!
Follow along and I'll share with you how this beauty came to be!

I found this wonderful piece of furniture on our local classifieds. I forgot to take a picture before I started sanding, sorry about that. I sanded the entire piece lightly and smoothed out any roughened areas. I also removed any hardware and taped off the mirror. After sanding I wiped it down with a little soap and water.

After a great deal of research (aka pinteresting), I decided this primer was the best way to go. It works great on almost any surface and since my piece was not solid wood I wanted to make sure the paint stuck! I did two coats of primer on the entire piece. I used a simple brush for corners and cracks and a roller (the kind used for cabinets) for the larger spaces. You will probably want to throw away the brush when you are done because this is an oil based primer which is hard to clean.

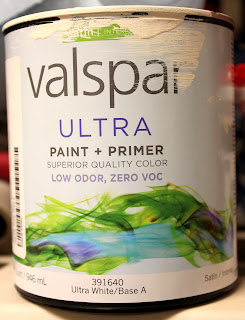
Next I picked my paint. I went with an antique white in the valspar brand. I don't believe I needed the primer + paint, it's just what the guy mixed up for me. I also bought this Floetrol. It helps to make the paint smooth so you will have no brush marks. You mix it right into the paint. I did two coats of paint after waiting for the primer to full dry.

I had some leftover stain from another project and decided to use it for this one. I mixed the stain with the clear polycrylic finish (about 1 part stain, 3 parts clear finish) in a disposable cup. I would brush the stain on and immediately wipe it off with a cloth. You kind of have to experiment with it until you learn how to get the look you want. It looks great to have lots of it in the cracks so don't wipe it all out.


After the stain dried, I finished the project with 2 coats of the polycrylic protective finish. This helps to seal everything off and give your furniture a protective layer. I am now in love with this stuff and would never skip this step!
This project ended up taking me several days between primer, paint, and protective finish drying times but I couldn't be happier with the results. Doing it the right way will help to keep this piece of furniture looking good for a long time!
Hope you enjoyed this tutorial and good luck on all of your furniture re-do's.


No comments:
Post a Comment